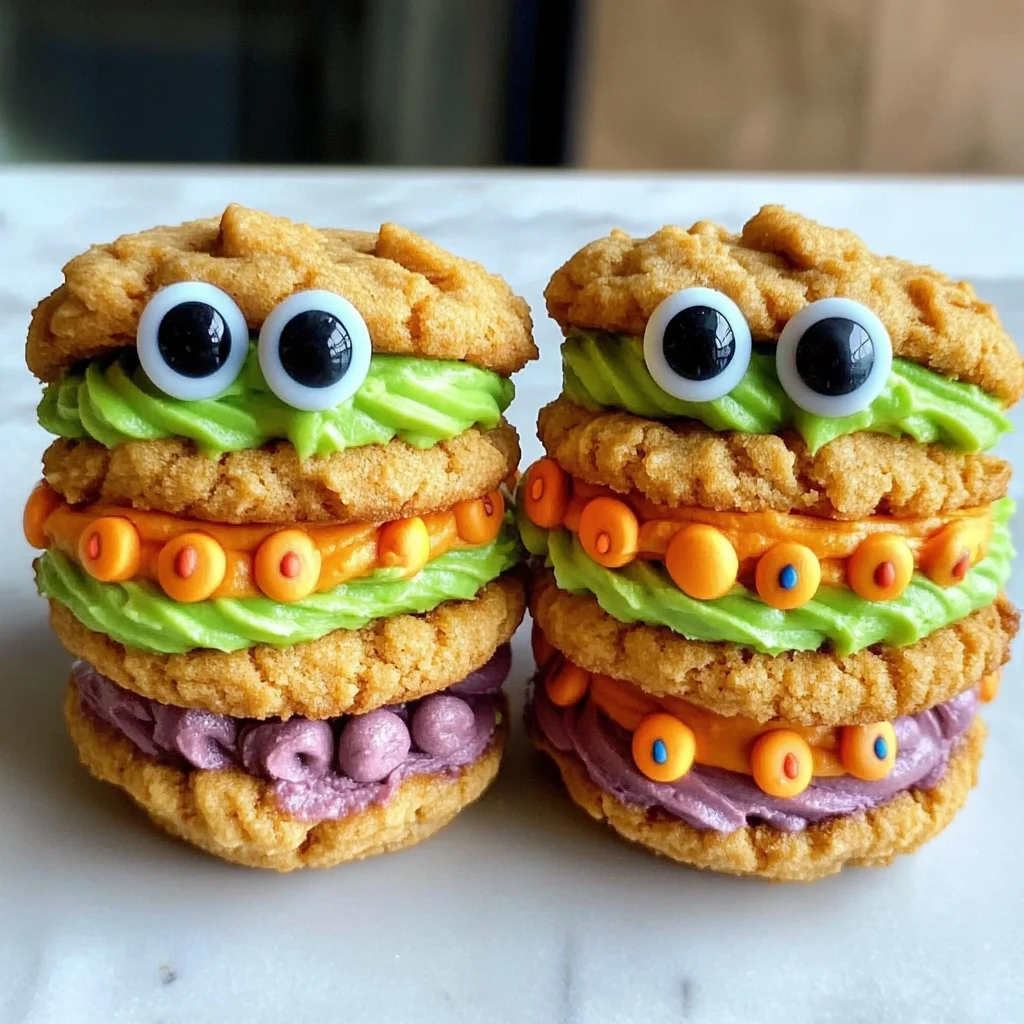
Monster Cookie Sandwiches
Monster Cookie Sandwiches are a delightful treat that brings joy to any occasion. Perfect for Halloween parties or fun family gatherings, these colorful sandwiches stand out with their playful design and delicious flavor. The combination of soft cookies and vibrant frosting makes them a hit with both kids and adults alike, ensuring they are remembered long after the party is over.
Why You’ll Love This Recipe
- Easy to Make: With simple ingredients and straightforward steps, anyone can whip up these delicious sandwiches.
- Customizable Frosting: Use your favorite colors to create unique designs for any occasion.
- Fun Presentation: The addition of candy eyes adds a whimsical touch that kids will love.
- Perfect for Sharing: Makes 18–20 sandwiches, ideal for sharing at parties or gatherings.
- Deliciously Sweet: The combination of buttery cookies and creamy frosting offers a satisfying treat.
Tools and Preparation
Having the right tools can make your baking experience smoother and more enjoyable. Here’s what you’ll need to create these Monster Cookie Sandwiches.
Essential Tools and Equipment
- Mixer
- Mixing bowls
- Piping bags (or plastic bags)
- Baking sheet
Importance of Each Tool
- Mixer: Essential for achieving a light and fluffy frosting that spreads easily on cookies.
- Mixing bowls: They help in organizing ingredients while mixing, preventing messes.
- Piping bags: Ideal for decorating; they allow you to create fun designs with precise control.
Ingredients
Perfect for Halloween Parties or Fun Family Treats!
🛒 Ingredients
(Makes 18–20 sandwiches)
For the Cookies
- Chips Ahoy cookies: 36–40 (for 18–20 sandwich pairs)
For the Frosting
- Unsalted butter: 1 cup (2 sticks), softened
- Powdered sugar: 4 cups
- Milk or heavy cream: 2–3 tablespoons
- Vanilla extract: 2 teaspoons
- Food coloring: Halloween colors like orange, green, purple, etc.
- Candy eyes: variety of sizes if desired
How to Make Monster Cookie Sandwiches
Step 1: Make the Frosting
In a medium bowl, beat together softened butter and powdered sugar until well combined.
Add vanilla extract along with 2–3 tablespoons of milk or cream. Beat until light and fluffy.
Step 2: Color the Frosting
Divide the frosting into separate bowls based on how many colors you want. Add food coloring to each bowl and mix until vibrant hues are achieved.
Step 3: Prepare Piping Bags (Optional)
Spoon the colored frosting into piping bags without tips or use plain round tips for decoration.
Step 4: Assemble the Cookie Sandwiches
Pair up cookies by size and shape. Flip one cookie from each pair upside down. Pipe or spread a generous dollop of frosting onto the flat side of each flipped cookie. Top with the second cookie to create a sandwich.
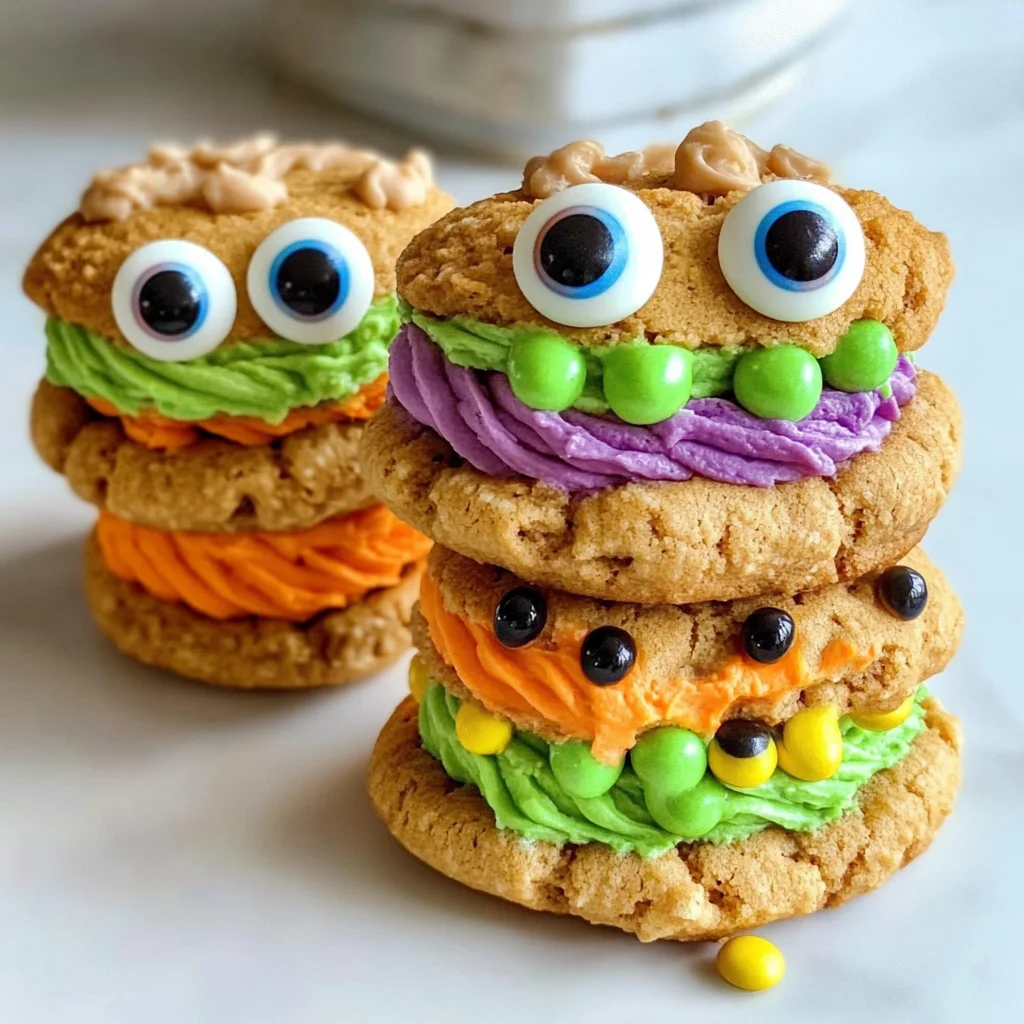
Step 5: Add Candy Eyes
While the frosting is still soft, carefully press candy eyes into the sides so they peek out like playful monster eyes. Get creative with your placements!
Step 6: Let Set & Store
Allow the frosting to firm up before serving. If not enjoying immediately, store the sandwiches in an airtight container in the fridge for up to 1–2 days.
Enjoy your festive Monster Cookie Sandwiches!
How to Serve Monster Cookie Sandwiches
Monster Cookie Sandwiches are a delightful treat that can be enjoyed in various fun ways. Whether it’s a festive gathering or a cozy family meal, serving these cookies creatively can enhance the experience.
Fun Presentation Ideas
- Monster-Themed Platter: Arrange the sandwiches on a spooky-themed platter with Halloween decorations like small pumpkins and cobwebs for an eye-catching display.
- Individual Treat Bags: Place each cookie sandwich in colorful treat bags tied with ribbons for easy grab-and-go options during parties.
- Milk Shooters: Serve mini milk shooters alongside the sandwiches for a playful twist on the classic milk and cookies pairing.
- Decorative Sticks: Insert festive decorative sticks into each sandwich to make them easier to hold and add a fun visual element.
Pairing Suggestions
- Ice Cream Scoops: Offer scoops of vanilla or pumpkin ice cream on the side for an indulgent dessert experience.
- Hot Cocoa Bar: Set up a hot cocoa station with toppings like whipped cream, sprinkles, and marshmallows to complement the sweetness of the sandwiches.
- Fruit Skewers: Balance the sweetness with fresh fruit skewers made from seasonal fruits like apple slices and grapes.
How to Perfect Monster Cookie Sandwiches
To ensure your Monster Cookie Sandwiches turn out perfectly every time, follow these simple tips.
- Use Room Temperature Butter: Start with softened butter for smoother frosting that is easier to spread or pipe.
- Experiment with Colors: Don’t hesitate to mix different food colors for vibrant, eye-catching frosting that enhances the fun theme.
- Choose Uniform Cookies: Pair cookies of similar size and shape for evenly stacked sandwiches that look more appealing.
- Chill Before Serving: Allow the assembled sandwiches to chill in the fridge briefly; this helps stabilize the frosting and makes them easier to handle.
Best Side Dishes for Monster Cookie Sandwiches
Serving side dishes alongside your Monster Cookie Sandwiches can create a well-rounded treat experience. Here are some great options:
- Fruit Salad: A refreshing mix of seasonal fruits provides a sweet contrast to cookies while adding nutritional value.
- Veggie Platter: Crisp vegetables with hummus or ranch dressing offer a crunchy, healthy option alongside sweet treats.
- Popcorn Mix: Create a fun popcorn mix with candy corn and chocolate chips that ties in nicely with Halloween themes.
- Cheese Board: A selection of cheeses paired with crackers adds savory flavors that balance out the sweetness of cookie sandwiches.
- Chips and Dip: Serve tortilla chips with salsa or guacamole for a crunchy side that offers variety in textures.
- Mini Cupcakes: Small cupcakes in festive colors can be an additional sweet treat without overwhelming guests.
Common Mistakes to Avoid
To ensure your Monster Cookie Sandwiches turn out perfectly, avoid these common mistakes.
- Not Softening the Butter: Always use softened butter for your frosting. Cold butter can lead to a lumpy texture that won’t spread well.
- Skipping the Milk: If your frosting is too thick, you might skip adding milk or cream. A couple of tablespoons make it fluffy and easy to work with.
- Overmixing the Frosting: It’s tempting to whip the frosting until it’s super fluffy, but overmixing can cause it to become too airy. Beat just until combined for the best texture.
- Ignoring Cookie Sizes: Pairing cookies that are too different in size can lead to uneven sandwiches. Always match cookies based on size and shape for a uniform look.
- Forgetting to Let Frosting Set: If you don’t allow the frosting to firm up before storing, your sandwiches may stick together. Patience is key!
- Not Using Piping Bags: While it’s optional, using piping bags allows for more creative frosting designs. Don’t miss out on the fun!
Storage & Reheating Instructions
Refrigerator Storage
- Store Monster Cookie Sandwiches in an airtight container.
- They will last for 1–2 days in the refrigerator without losing freshness.
Freezing Monster Cookie Sandwiches
- Place assembled sandwiches in a single layer on a baking sheet.
- Freeze until solid and then transfer them to a freezer-safe container or bag.
- They can be stored frozen for up to 3 months.
Reheating Monster Cookie Sandwiches
- Oven: Preheat to 350°F (175°C). Warm sandwiches for about 5 minutes; they’ll soften nicely.
- Microwave: Heat one sandwich at a time for about 10-15 seconds. Be cautious not to overheat, as they can become too soft.
- Stovetop: Place sandwiches in a pan over low heat for a few minutes, flipping occasionally to warm evenly.
Frequently Asked Questions
What are Monster Cookie Sandwiches?
Monster Cookie Sandwiches are delightful treats made by sandwiching colorful frosting between two cookies, perfect for celebrations!
Can I customize my Monster Cookie Sandwiches?
Absolutely! You can choose different colors of frosting or add sprinkles and other edible decorations based on your preferences.
How long do Monster Cookie Sandwiches last?
When stored properly in an airtight container, they will stay fresh for about 1–2 days in the refrigerator and up to 3 months if frozen.
What can I use instead of Chips Ahoy cookies?
You can substitute Chips Ahoy with any store-bought chocolate chip cookies or homemade versions that suit your taste.
Final Thoughts
Monster Cookie Sandwiches are not only fun and festive but also versatile enough for any occasion. You can easily customize them with different colors and decorations, making them perfect treats for kids and adults alike. Give this recipe a try and unleash your creativity!
Monster Cookie Sandwiches

Indulge in the whimsical delight of Monster Cookie Sandwiches, a perfect treat for festive gatherings or cozy family moments. These vibrant sandwiches pair soft cookies with colorful frosting and playful candy eyes, making them a hit for both kids and adults. Whether you’re hosting a Halloween party or simply looking to brighten up snack time, these easy-to-make cookie sandwiches will bring smiles and sweet memories. Customize the frosting colors to match any occasion, and let your creativity shine with fun designs. Each bite delivers a satisfying mix of flavors and textures that are sure to impress.
- Prep Time: 20 minutes
- Cook Time: 0 minutes
- Total Time: 20 minutes
- Yield: About 18–20 sandwiches
- Category: Dessert
- Method: Baking
- Cuisine: American
Ingredients
- Chips Ahoy cookies (36–40 for 18–20 sandwich pairs)
- Unsalted butter (1 cup, softened)
- Powdered sugar (4 cups)
- Milk or heavy cream (2–3 tablespoons)
- Vanilla extract (2 teaspoons)
- Food coloring (various colors)
- Candy eyes
Instructions
- In a medium bowl, beat softened butter and powdered sugar until well combined. Add vanilla extract and milk/cream; beat until light and fluffy.
- Divide frosting into bowls; add food coloring to achieve desired hues.
- Spoon colored frosting into piping bags for decoration.
- Pair cookies by size; flip one upside down, pipe frosting onto it, and top with another cookie.
- Press candy eyes into the frosting while it's still soft.
- Allow to set before serving, storing in an airtight container in the fridge for up to 1–2 days.
Nutrition
- Serving Size: 1 sandwich
- Calories: 210
- Sugar: 18g
- Sodium: 160mg
- Fat: 9g
- Saturated Fat: 5g
- Unsaturated Fat: 3g
- Trans Fat: 0g
- Carbohydrates: 32g
- Fiber: 0g
- Protein: 1g
- Cholesterol: 30mg